How to Clean Your Kitchen Appliances
Hello! I’m Alex and I work for Emily’s Maids, a cleaning company in Dallas, TX. I’m happy to collaborate with RENEW Cleanup today on this article. Today, we wanted to share with you some cleaning tips for your kitchen appliances.
You often find guides on the internet for all the big appliances and surfaces in your kitchen. Everything from countertops to fridges and stoves. But what about smaller appliances? You’ll find all about that here.
We know how hard it is to clean every single nook and cranny from these appliances, on top of the rest of your kitchen (and your home). So, unless you hire a professional cleaning service, there’s a lot on your plate. But don’t worry! With this guide, you will learn to clean them faster and more effectively.
We will cover items like your blender, your coffee maker, and your electric mixer.
Let’s get right into it!
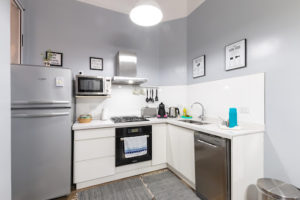
Let’s make sure your secondary kitchen appliances get some love. Source: Fred Kleber / Unsplash
How to Clean Your Kitchen Blender
Blenders are one of the most helpful, must-have appliances in any kitchen, and it has been that way for 100 years now! But let’s be honest, sometimes we skip using our blender to avoid dealing with it afterward when it’s dirty.
Your blender can be a little annoying to clean because of the blades. There are two choices here: the first one is a nice, deep cleaning which requires you to take apart the blender to clean each piece carefully.
If you want to take it apart, start by unplugging your blender and removing the jar assembly from the base. Remove the gasket seal and the blades and clean all pieces by soaking them in hot, soapy water for 15 minutes. This will soften up grease and food residues, and you will just need to scrub softly with a sponge, then rinse and let dry.
As for the base, unplug it and then just spray some white vinegar on a clean microfiber cloth and wipe carefully.
However, you don’t need to do that all the time: you can clean it all at once without taking it apart. For quick cleaning, fill half of your blender with warm water and add ½ teaspoon of dish soap. Place your blender jar on the base, fasten the lid and turn it on for 5 to 10 seconds. The soap will remove everything for you without having to scrub endlessly.
Make sure you rinse with plenty of water to remove any residues. If any of your ingredients were particularly smelly (such as garlic or green onion), add 1/4 cup of vinegar and one spoon of baking soda. They are both great at removing smells. Rinse well to remove any lingering smells.
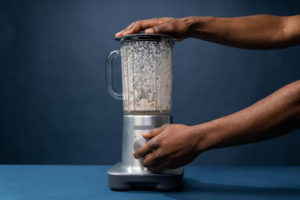
Cleaning a blender is easier than you think. Source: Cottonbro / Pexels
How to Clean Your Coffee Maker Part I: Descaling
Our next appliance on the list is the coffee maker.
Coffee is a must-have in every household to give us the energy to start our day off. With time, coffee makers need to be descaled. This is because water releases sediments (which are very small minerals) that slowly get attached to the bottom of your coffee maker. This depends on the area you live in, too. Certain areas such as Dallas have considerably hard water, which means that it has a higher count of minerals, to begin with.
This might affect the delicious flavor of coffee and that’s why you should descale it occasionally, around 4 times a year. Besides, it needs some cleaning on the inside to remove coffee oil residues.
Here’s what you need to do: you can either purchase a manufactured coffee descaler (which is effective and safe to use, although a bit expensive) or you can try a DIY coffee descaler. You have two good choices here: citric acid and white distilled vinegar.
If you’re using citric acid, mix two tablespoons to 4 cups of water and fill your reservoir with your cleaning mix. Run your coffee maker as if you were making coffee. You might need to repeat the steps if your area has hard water.
If you are using vinegar instead, mix one cup of vinegar with three cups of water. Scale all measurements up or down depending on the size of your coffee maker.
Depending on the type of coffee maker, it might let you know through a light indicator if it needs descaling, or it might not have that function. Just in case, don’t forget to descale it at least a few times a year, up to once every a month if your area has very hard water.
You will notice the difference the next time you make coffee.

By now, your coffee should come out smelling and tasting like brand new. Source: Alessandro Crosato / Unsplash
How to Clean Your Coffee Maker Part II: General Cleaning
Besides descaling, you need to clean the outside of your coffee maker, as well as the inner components, to remove coffee residues, as well as the occasional spilling and the grease that it absorbs from other kitchen appliances.
You need to do this more often, but it’s fairly easy, even easier than descaling. To remove coffee residues, simply remove the brew basket and filter and discard any coffee grounds and the disposable paper filter. Soak the brew basket and the permanent filter (if it has one) in hot, soapy water. Let it sit for 5 minutes.
In the meantime, grab your carafe, and store any remaining coffee in a cup. Rinse the carafe using warm water, and grab some soapy water and a soft sponge to clean the carafe inside out.
Back to the brew basket and the permanent filter: scrub using your kitchen sponge in a soft, circular motion. You might want to use an old toothbrush, especially for the permanent coffee filter.
Rinse everything out with warm water and let dry.
For the outside, grab a clean microfiber cloth and dip it in soapy water. Wipe down the outside softly without applying pressure. Scrub a bit harder if you notice areas with coffee or grease stains. Wipe again with a clean, damp cloth to remove soap residues.
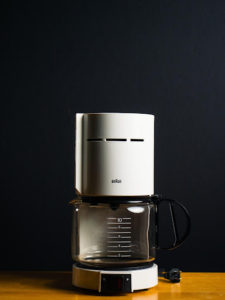
You just need a wet soapy cloth to clean the outside. Source: Ronan Furuta / Unsplash
How to Clean Your Electric Mixer
If you love cooking, electric mixers are a must. You can make really easy desserts and you don’t need to be a chef: a mixer will give you the perfect consistency before preparing a delicious chocolate cake, fresh-baked cookies, or a meringue to put on top of your hot cocoa. You can use it for savory foods too! For example, you can shred (previously cooked) chicken or meat in less than 30 seconds with your mixer.
However, it might be a nightmare to clean an electric mixer, especially if you let food residues dry on the beaters or dough hooks. This is why the first cleaning tip would be to clean it as soon as possible! The fresher the mix/dough, the quicker it will be to remove it.
If you just finished using your mixer, now it’s time for washing every component. Start with unplugging your mixer before doing any cleaning.
Start with the hand-wash attachments such as hooks, whisks, or beaters. You can place all of them in a small container and fill it with hot, soapy water. We know these attachments are a bit hard to reach, so help yourself using a toothpick for any stubborn residues, or a clean wire brush or sponge.
Rinse with plenty of water and let dry before storing or using again.
If this is a stand mixer, you also need to wash your bowl. You can put it in the dishwasher or you can wash it by hand. The bowl is likely stainless steel. With time, you might see little stains or scratches.
For the outside areas, use the same method as your coffee maker: a wet microfiber cloth with just a drop of dish detergent, and then another clean cloth to wipe any soap residue.
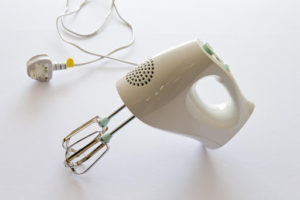
Rember to let dry all your components before storing or using again. Source: PxHere
Conclusion
With these cleaning tips, we hope your appliances will look like new after you take care of them. Here’s a quick recap of our tips:
Let’s start with your kitchen blender. You can take every piece apart and clean it using hot, soapy water. You can use the blender itself to clean it out by blending a cleaning mix using soap and vinegar
Next, we have the coffee maker. This might take a bit more work because it needs both descaling (to remove sediments) as well as regular cleaning. You can use a cleaning solution with either vinegar or citric acid. This could cause a different kind of buildup with time, so make sure to use commercial descaling liquid occasionally to prevent this.
Finally, for your electric mixer, you should start with washing the beaters or hooks. Use a toothpick to help yourself reach all the nooks and crannies. Next, wash your bowl with hot water and soap, and wipe the motor head and the base.
As a rule of thumb, remember to unplug your appliances before cleaning them, and always clean them as soon as you stop using them to prevent food residues from drying out and getting stuck.
Remember, you don’t need to take care of cleaning your entire house on your own. If you’re thinking of hiring a professional cleaning service, make sure you find one with plenty of experience as well as exceptional reviews, such as Emily’s Maids of Dallas or RENEW cleanup.
Thanks again to RENEW Cleanup for this collaboration and we hope you are able to enjoy these tips and make your way to a sparkling kitchen!

